Set up Single Sign-On with Google Workspace
With minimal configuration efforts, this connector allows integration with Microsoft Entra ID for enterprise SSO.
For more information about SSO and how to configure SSO in Logto, please check out the Enterprise SSO (SAML & OIDC) documentation to get started.
Step 1: Create a new project on Google Cloud Platform
Before you can use Google Workspace as an authentication provider, you must set up a project in the Google API Console to obtain OAuth 2.0 credentials, If you already have a project, you can skip this step. Otherwise, create a new project under your Google organization.
Step 2: Config the consent screen for your application
In order to create a new OIDC credential, you need to configure the consent screen for your application.
- Navigate to the OAuth consent screen page and select the
Internaluser type. This will make the OAuth application only available to users within your organization.
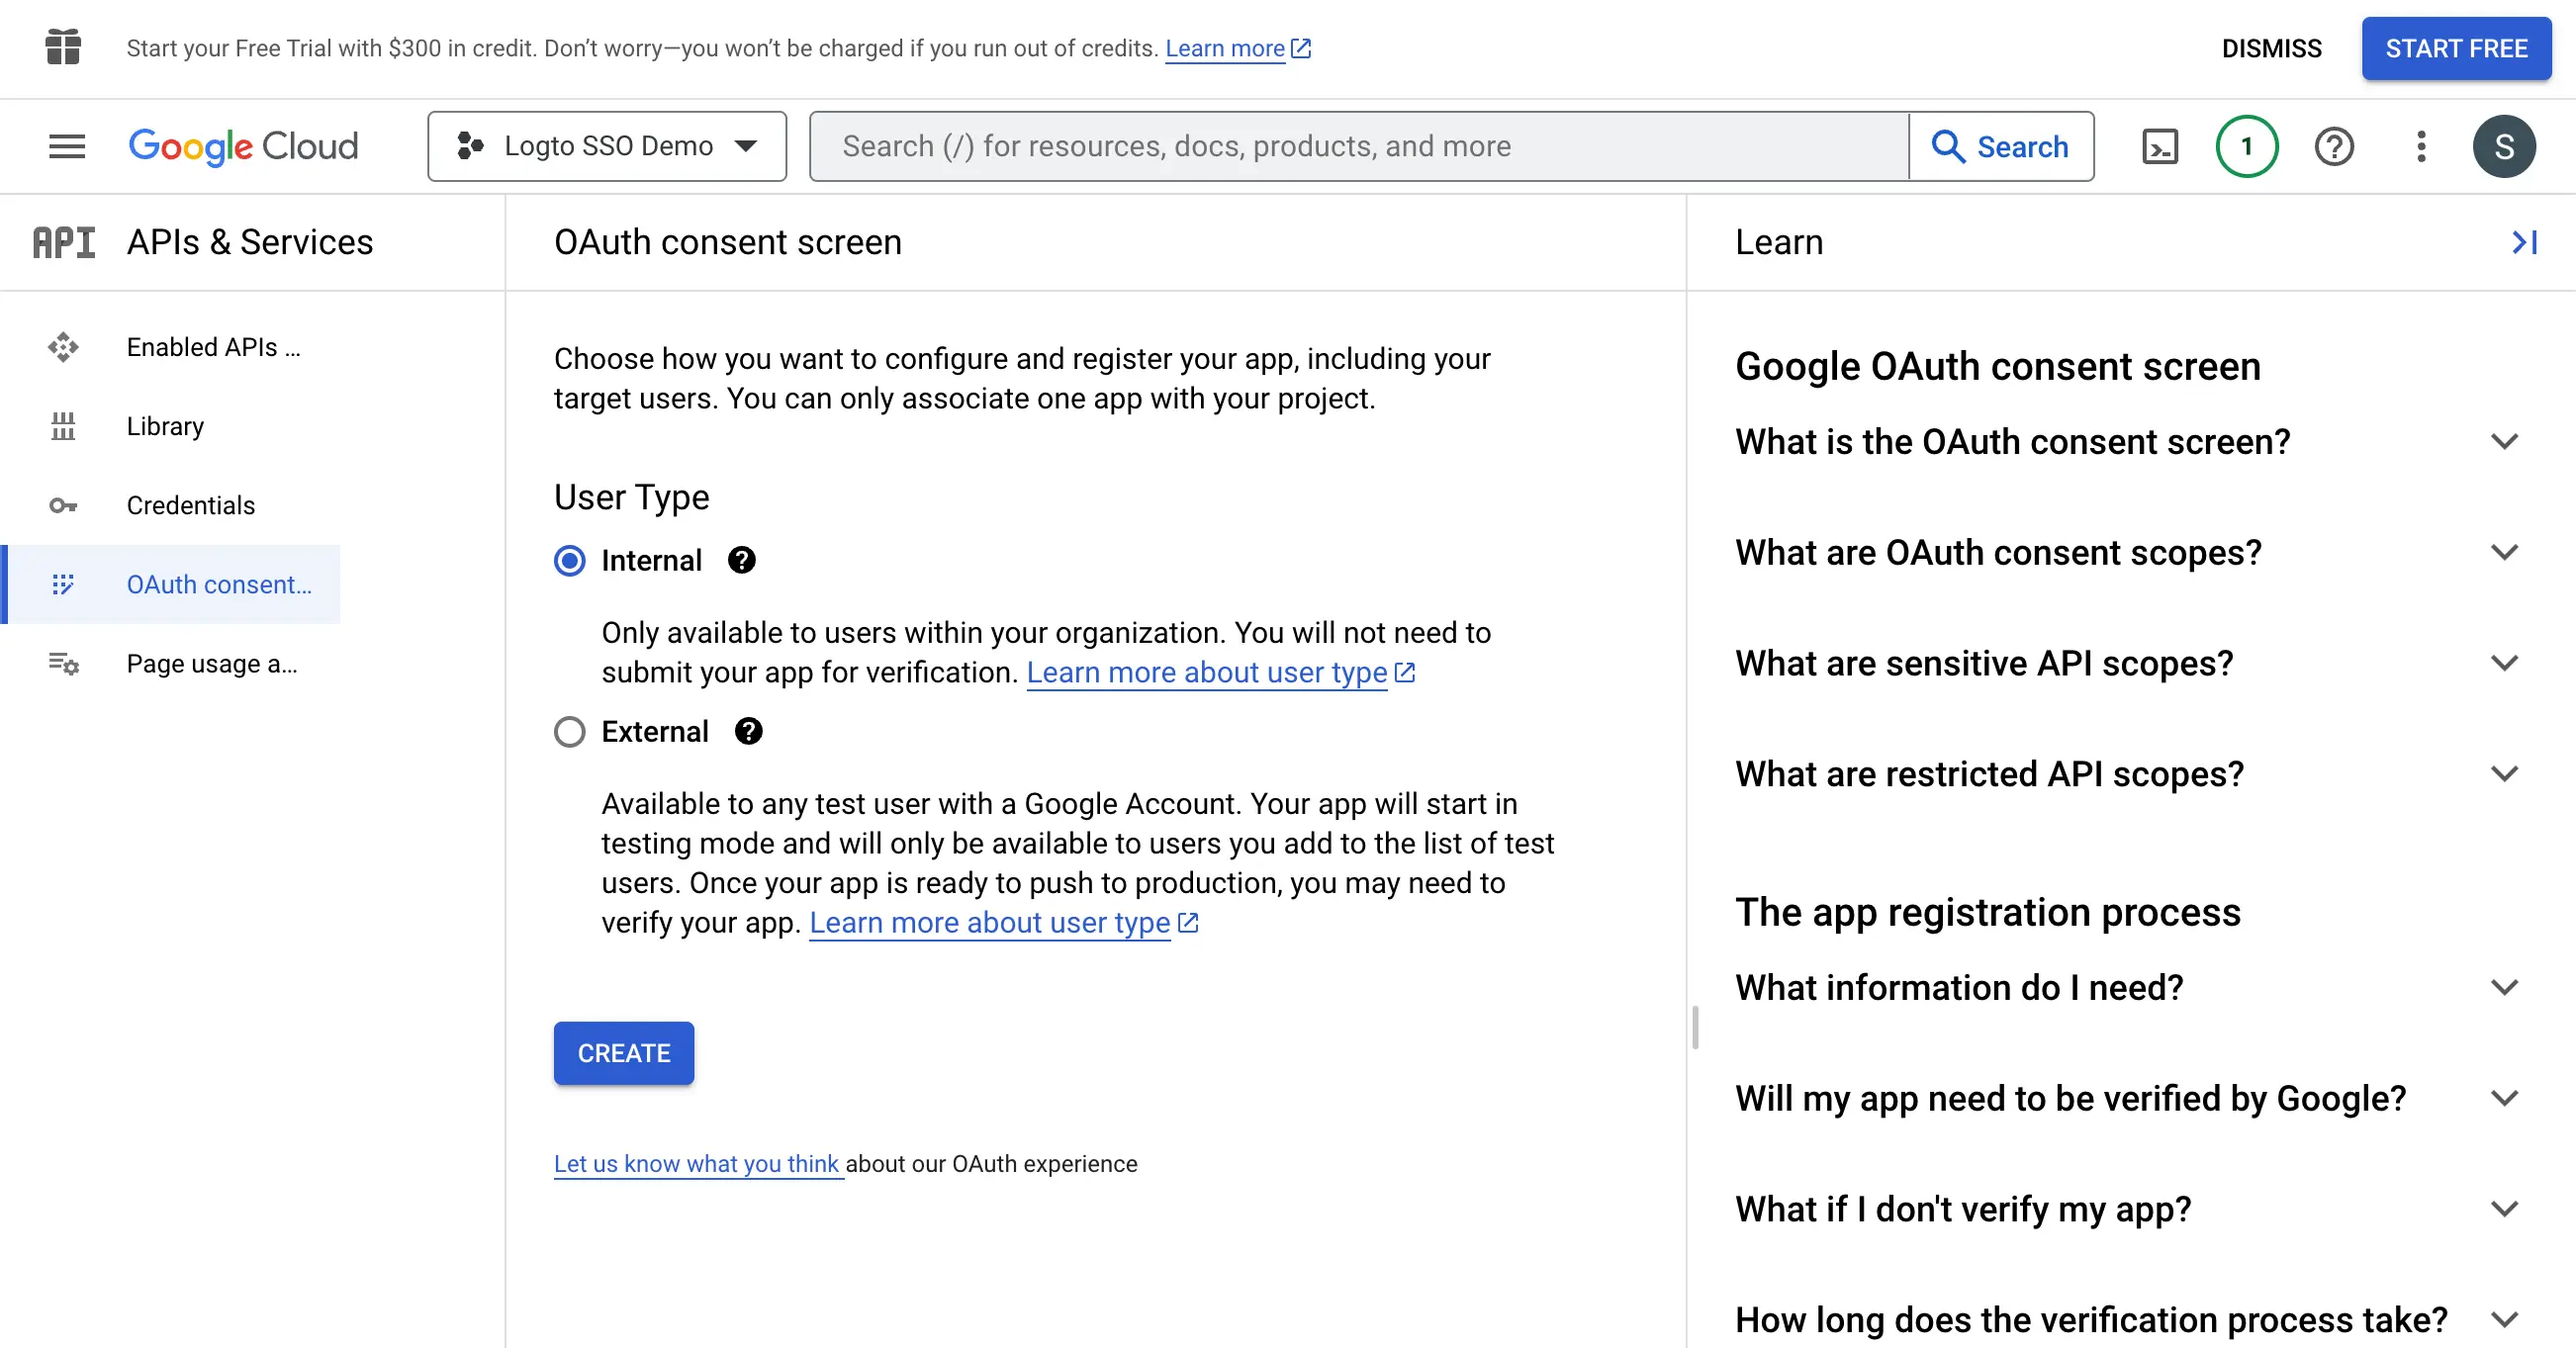
- Fill in the
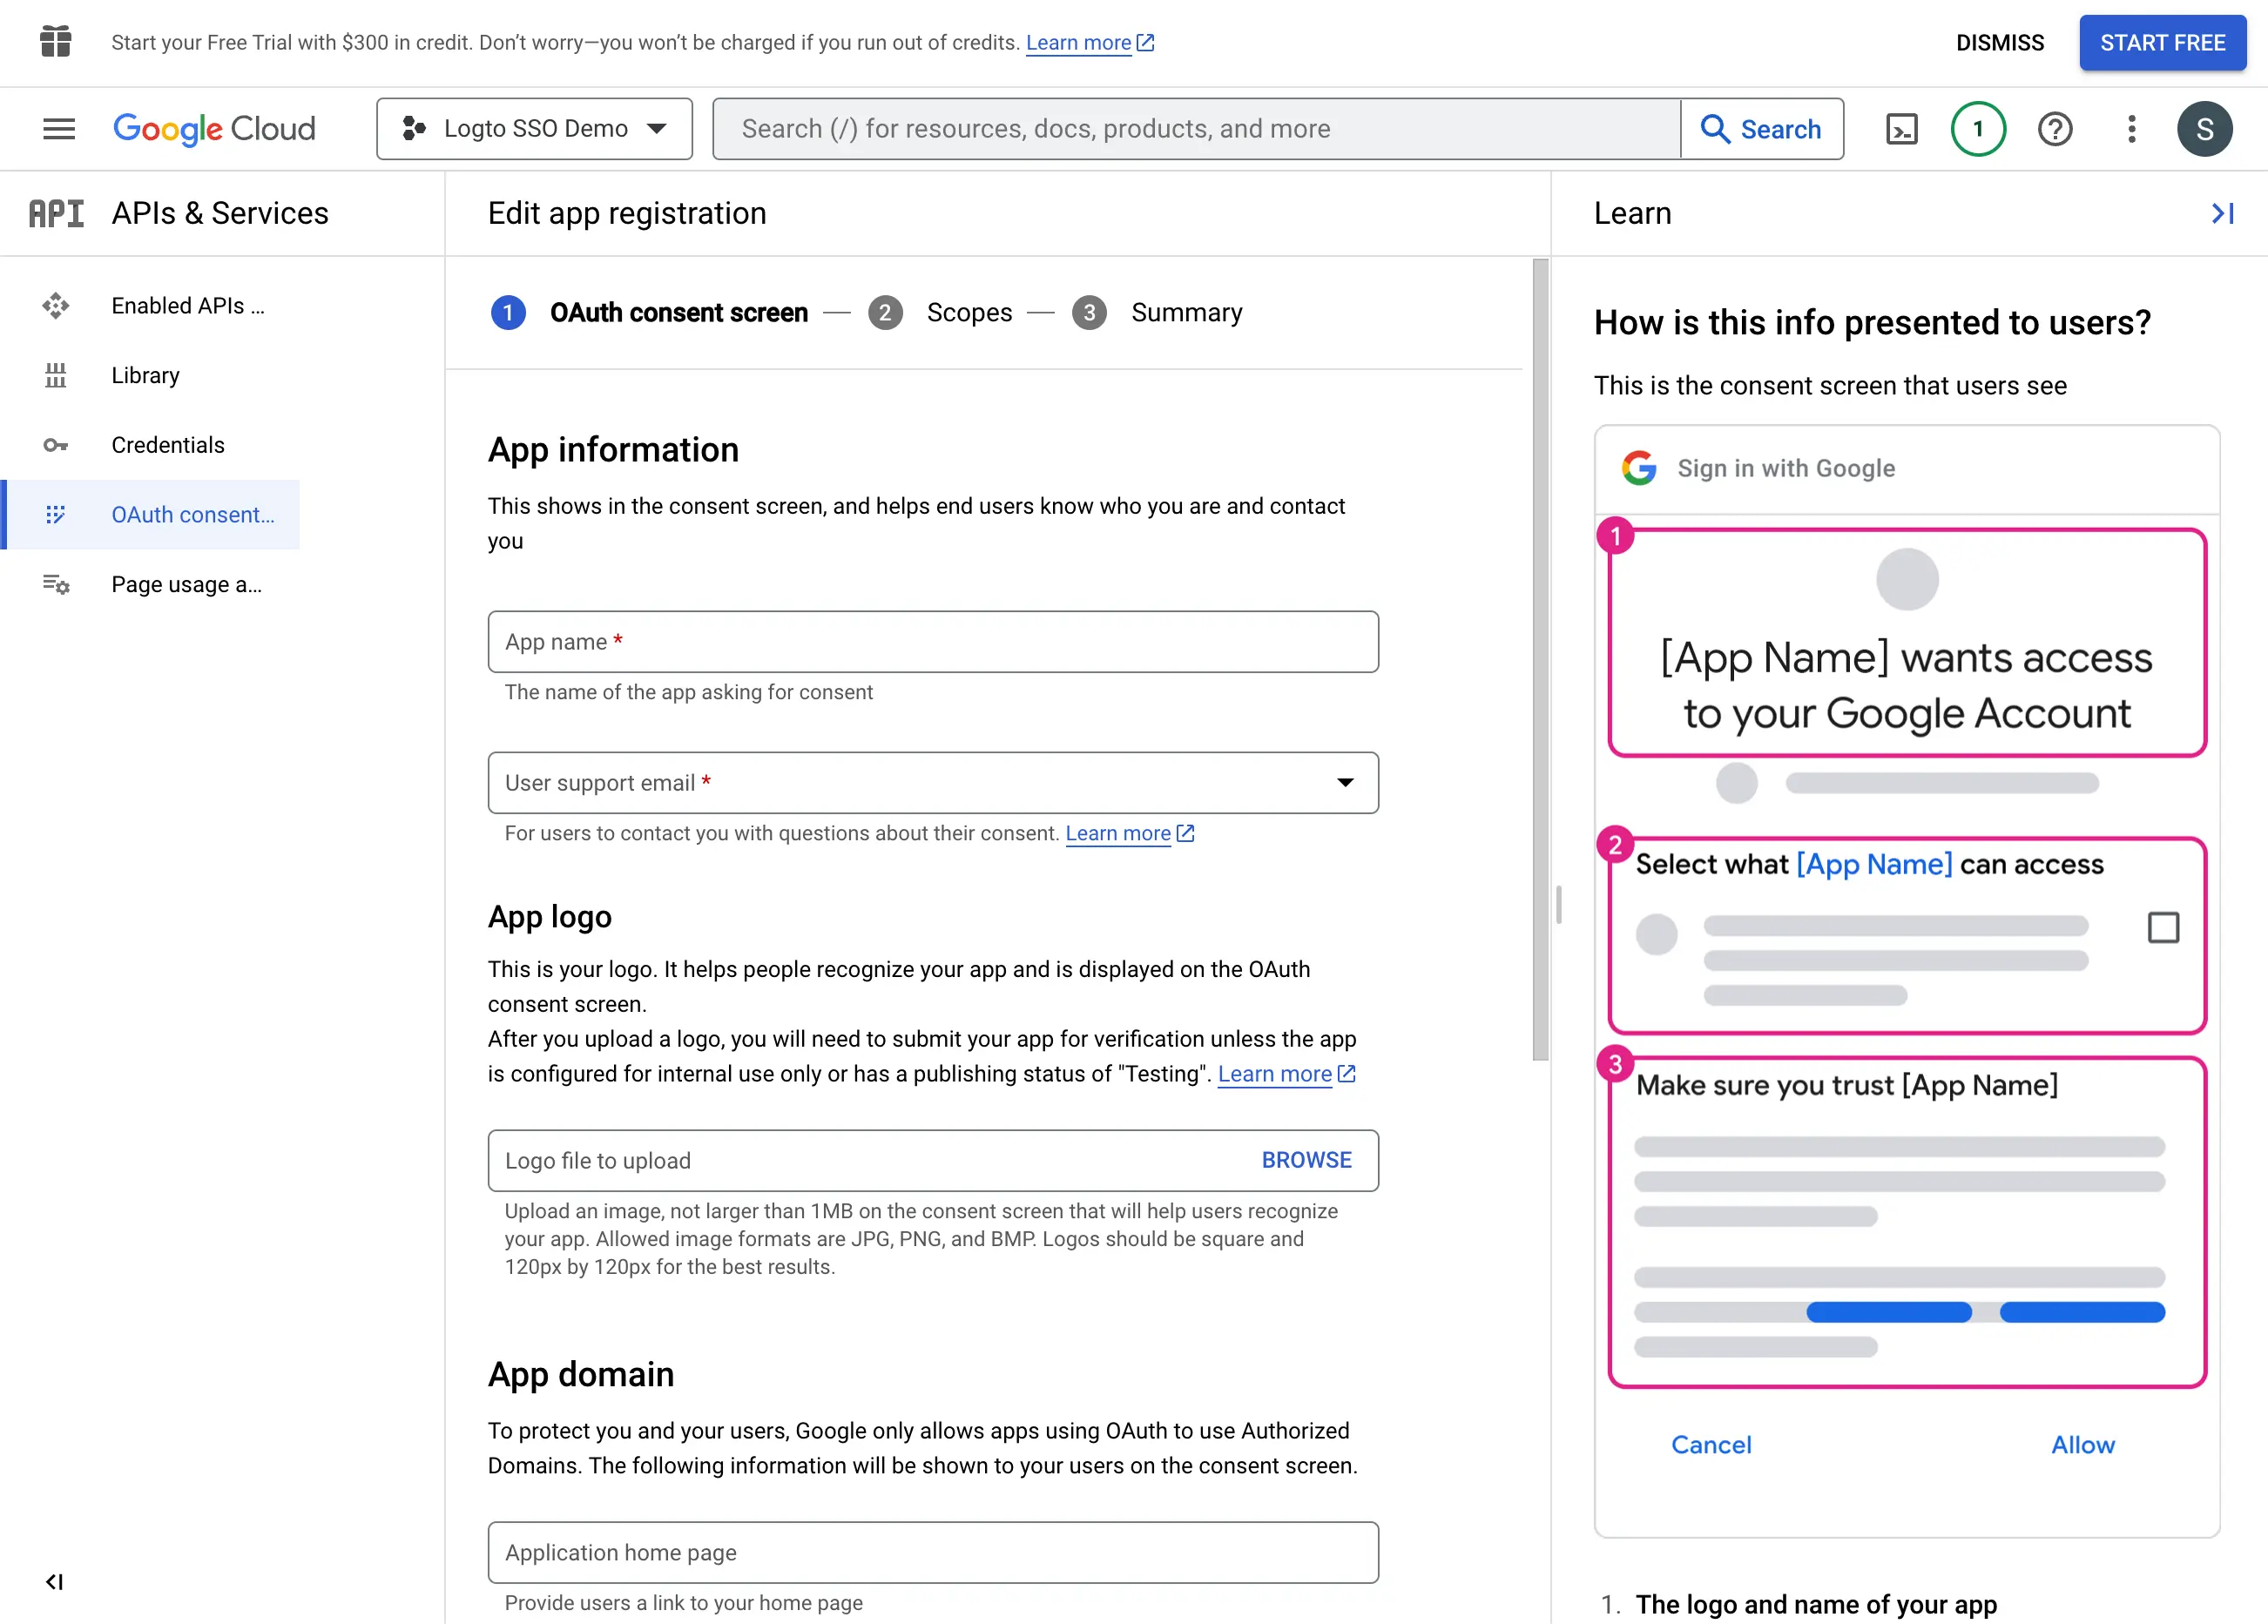
Consent Screensettings following the instructions on the page. You need to provide the following minimum information:
- Application name: The name of your application. It will be displayed on the consent screen.
- Support email: The support email of your application. It will be displayed on the consent screen.
- Set the
Scopesfor your application. In order to retrieve the user's identity information and email address properly from the IdP, Logto SSO connectors need to grant the following scopes from the IdP:
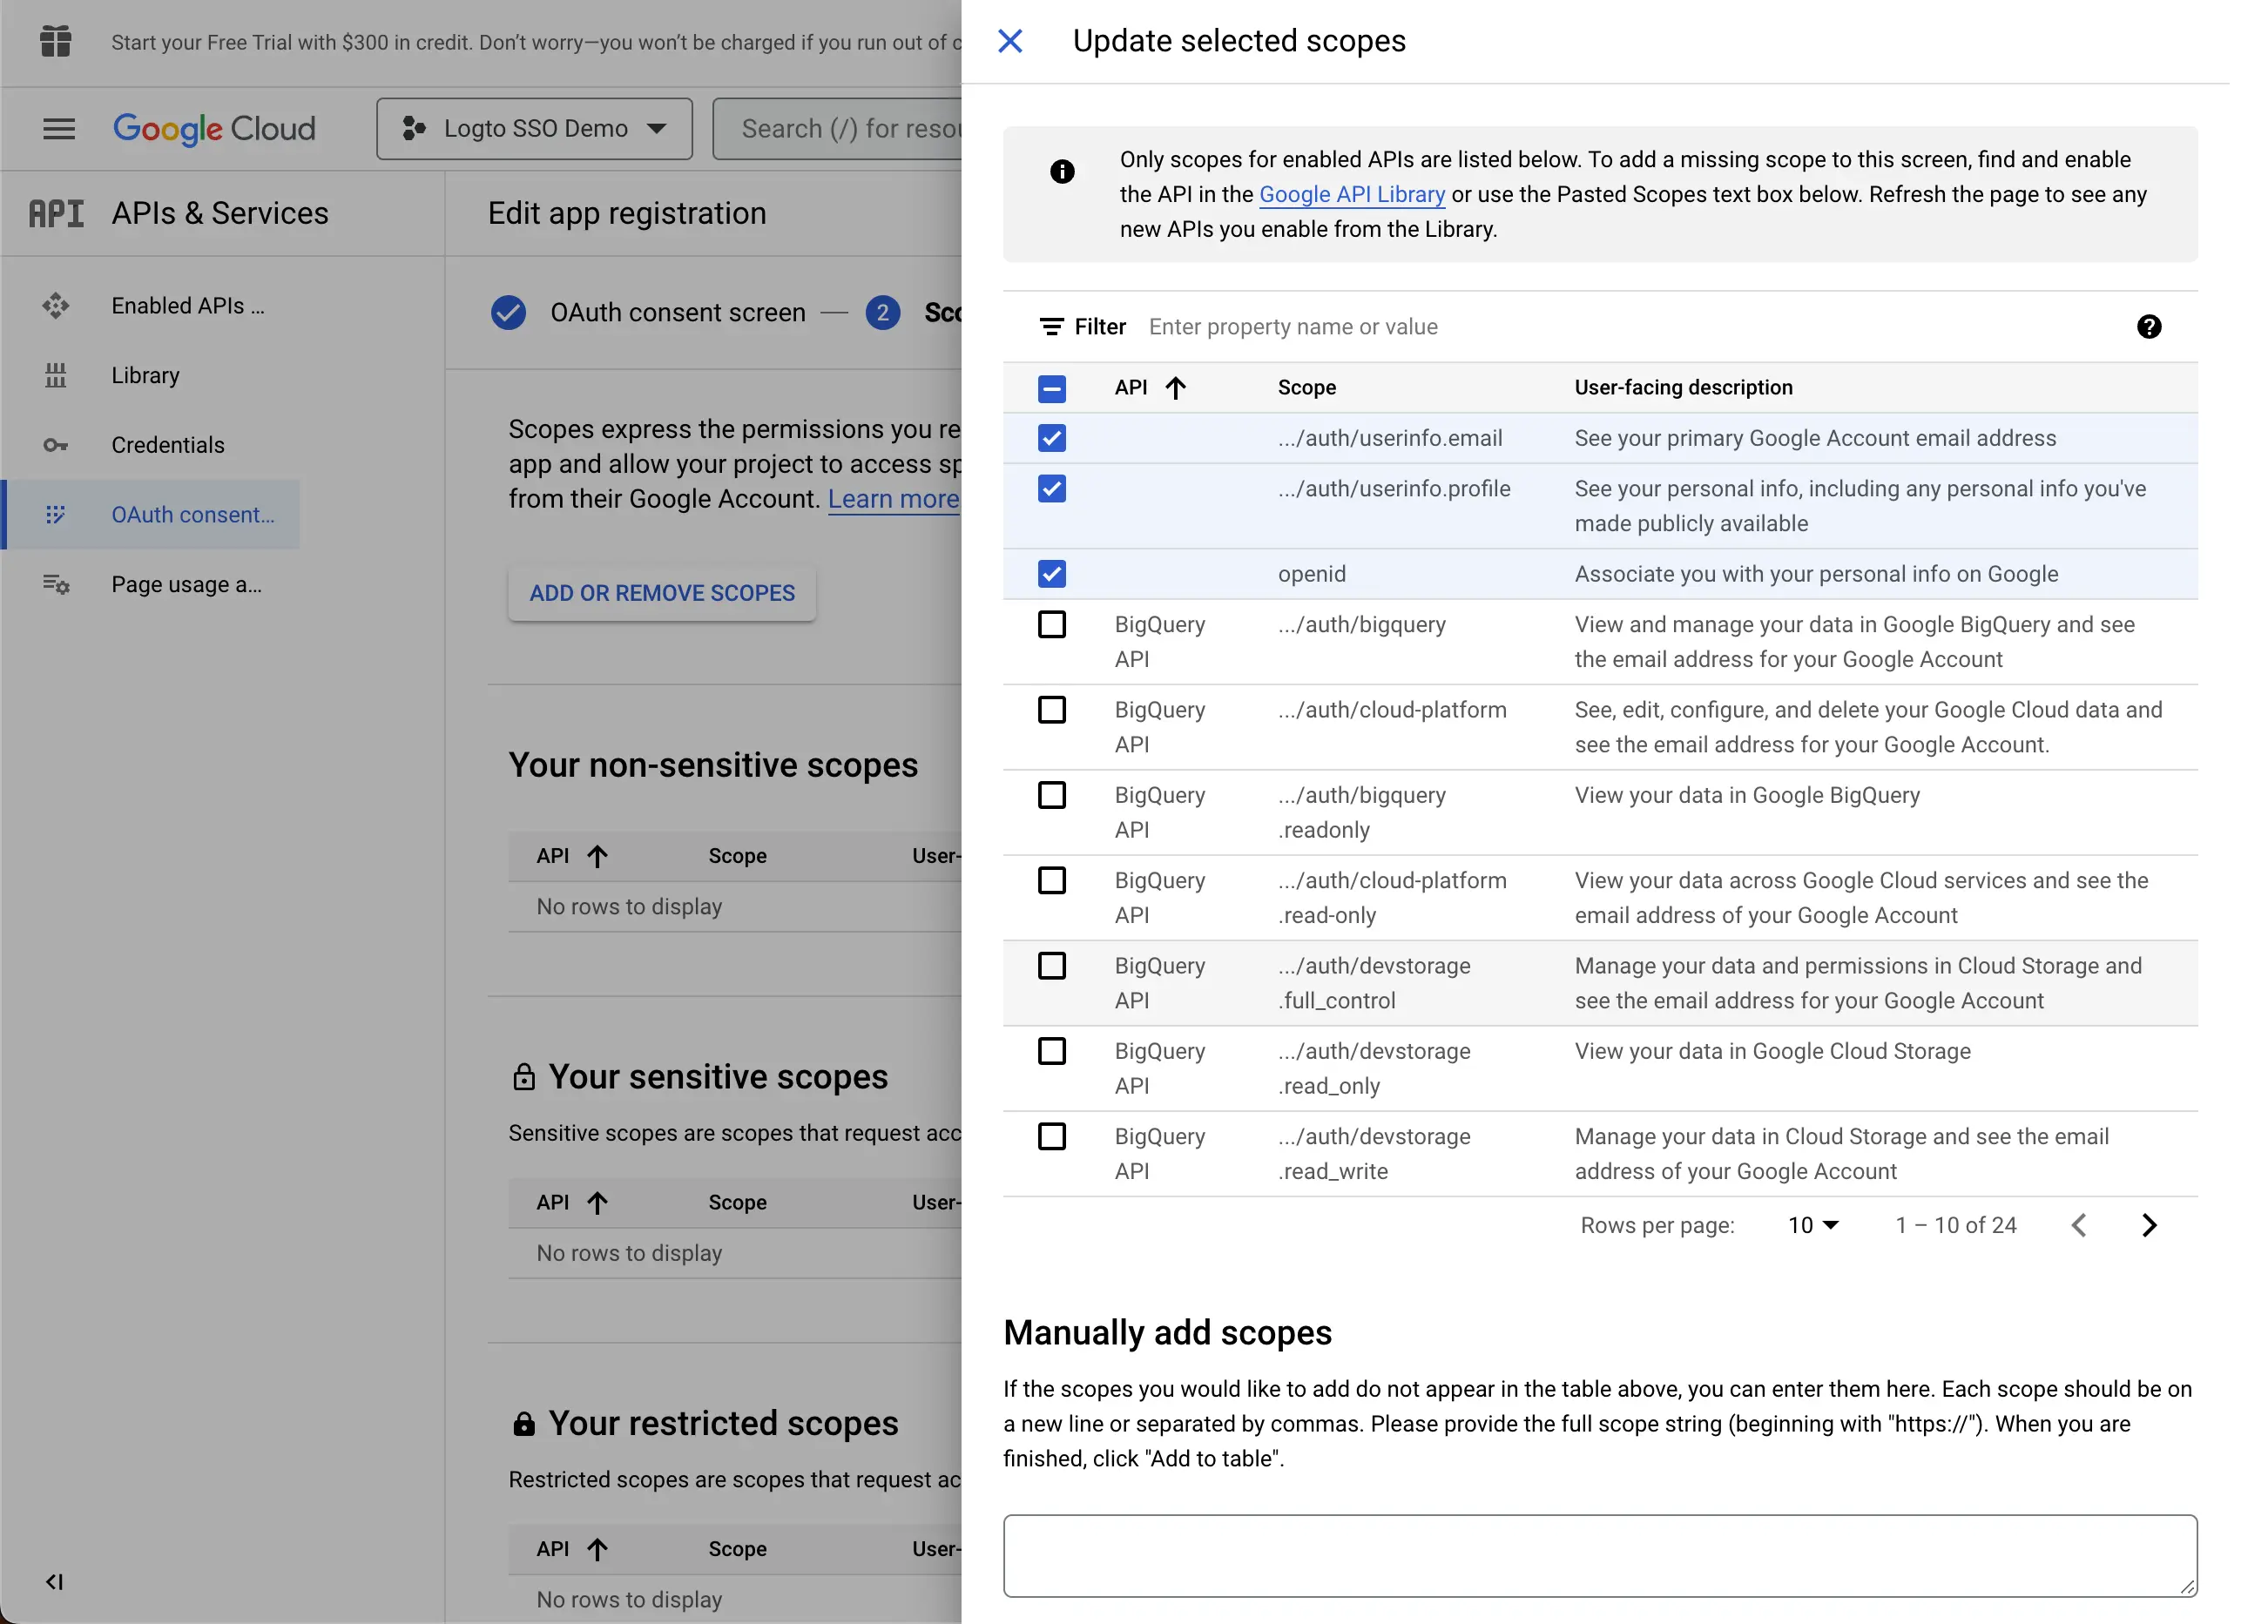
- openid: This scope is required for OIDC authentication. It is used to retrieve the ID token and get access to the userInfo endpoint of the IdP.
- profile: This scope is required for accessing the user's basic profile information.
- email: This scope is required for accessing the user's email address.
Click the Save button to save the consent screen settings.
Step 3: Create a new OAuth credential
Navigate to the Credentials page and click the Create Credentials button. Select the OAuth client ID option from the dropdown menu to create a new OAuth credential for your application.
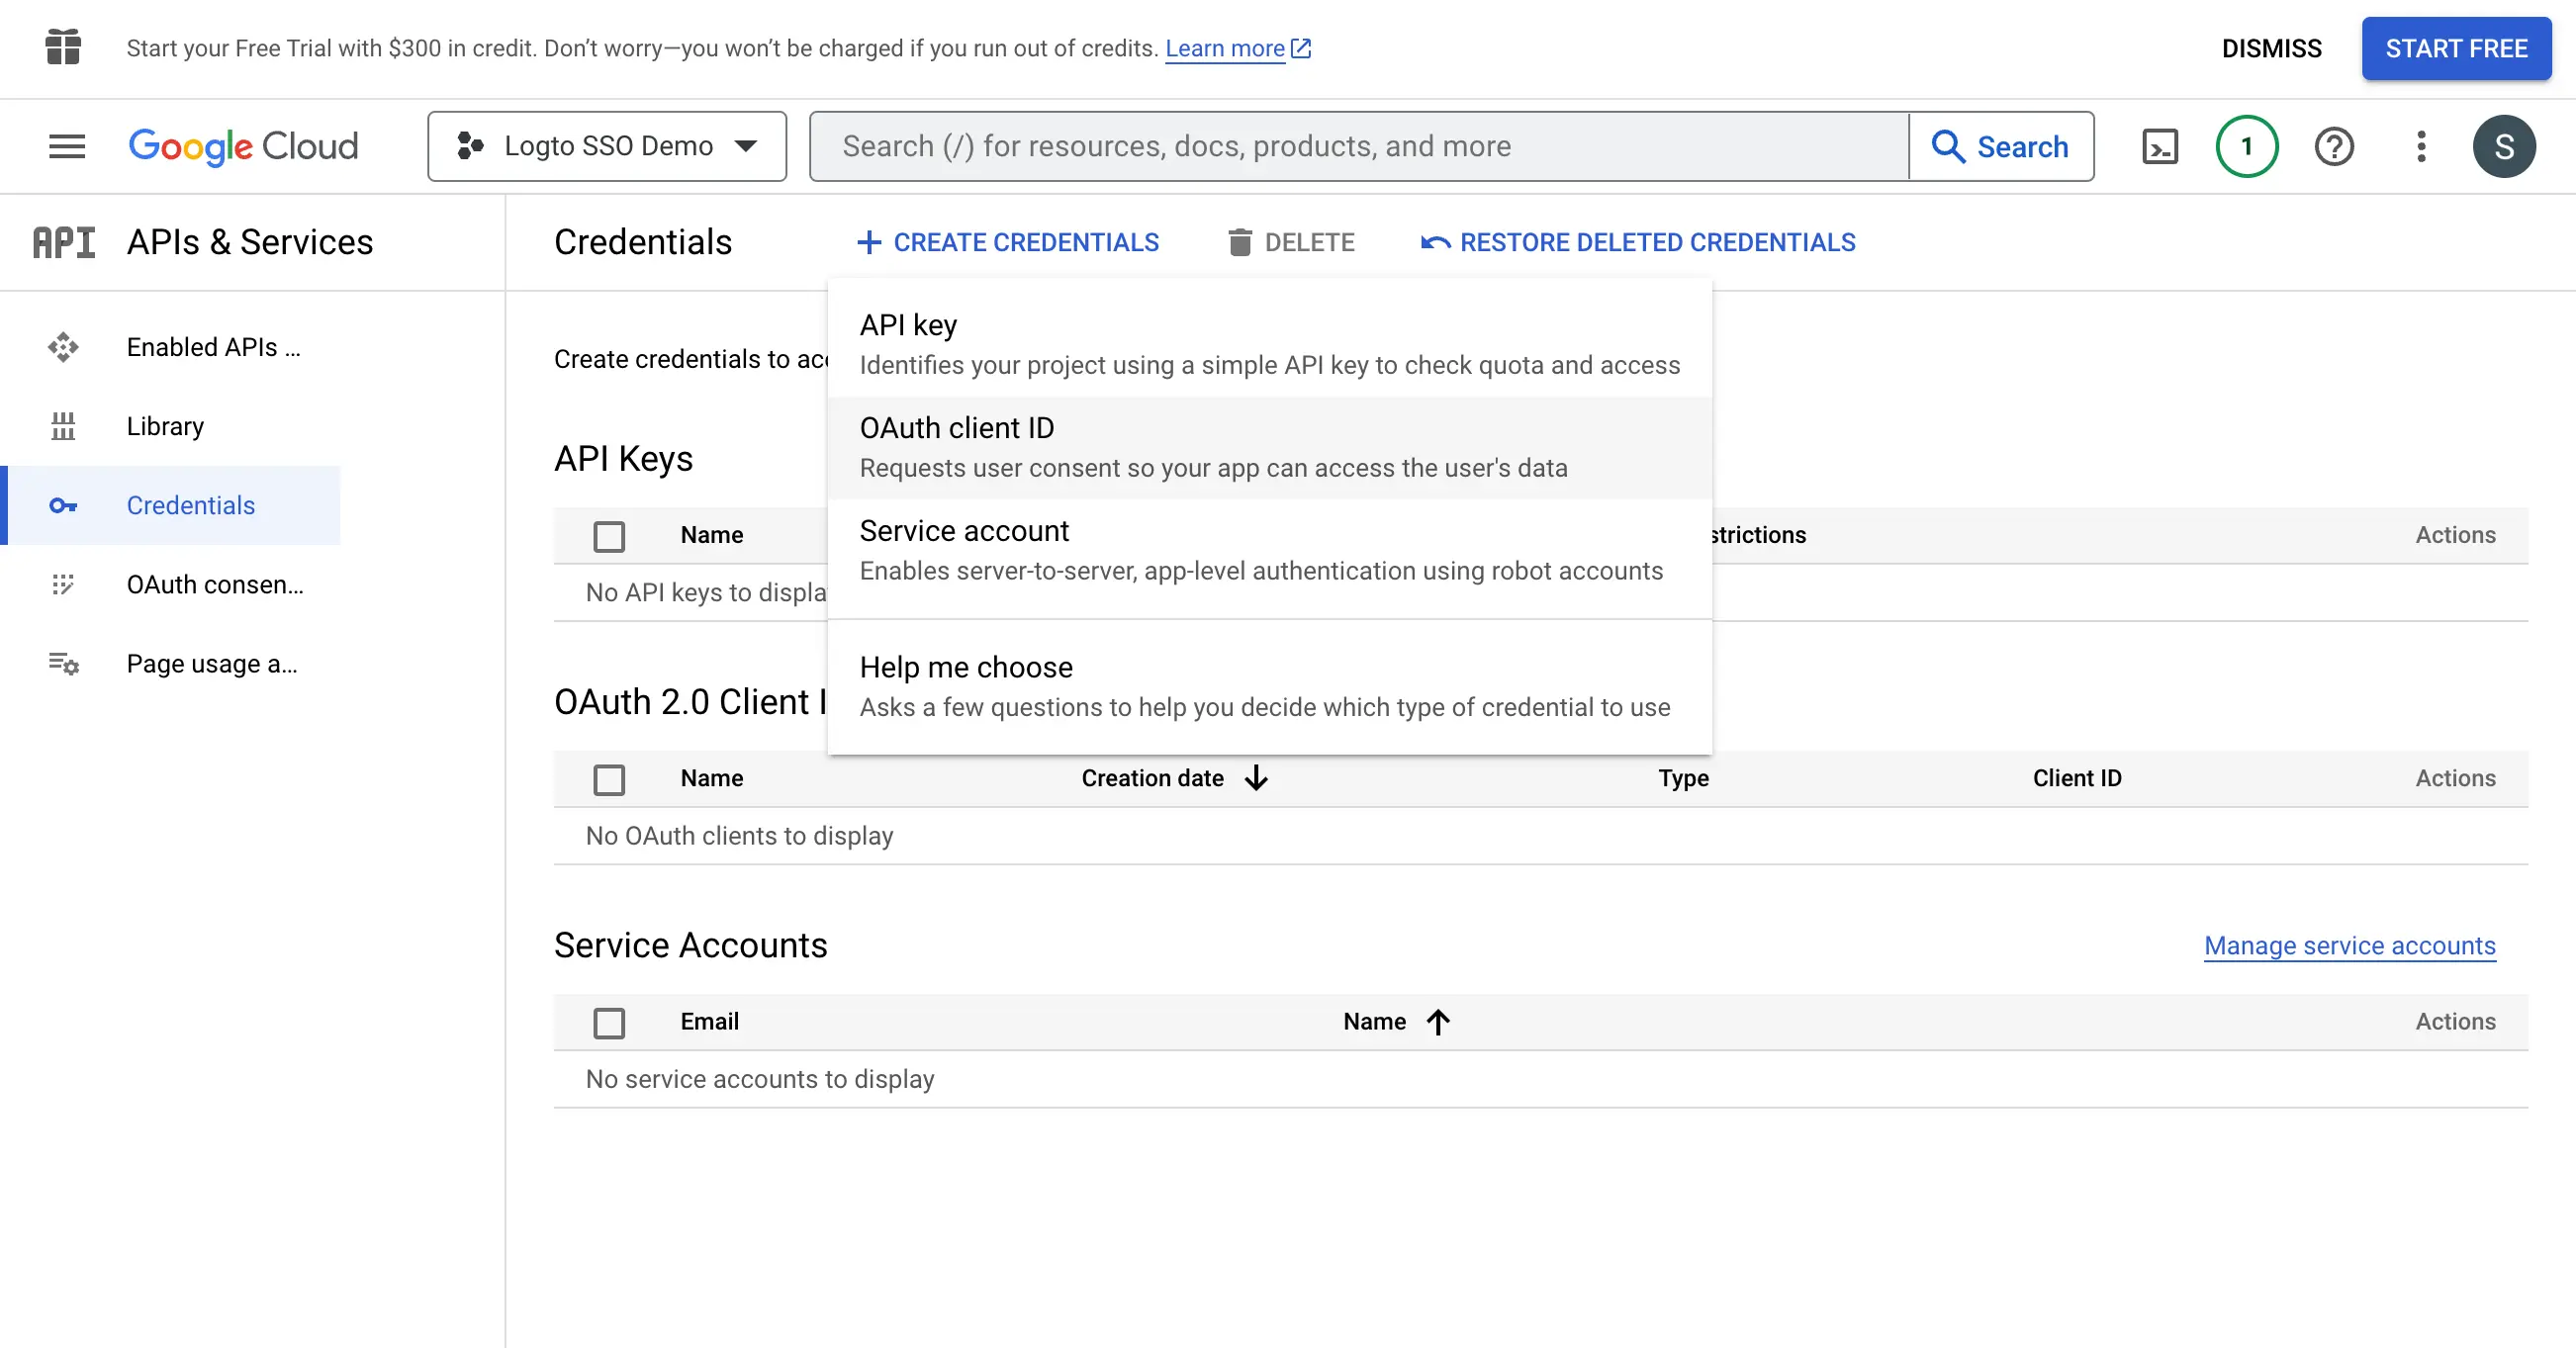
Continue setting up the OAuth credential by filling up the following information:
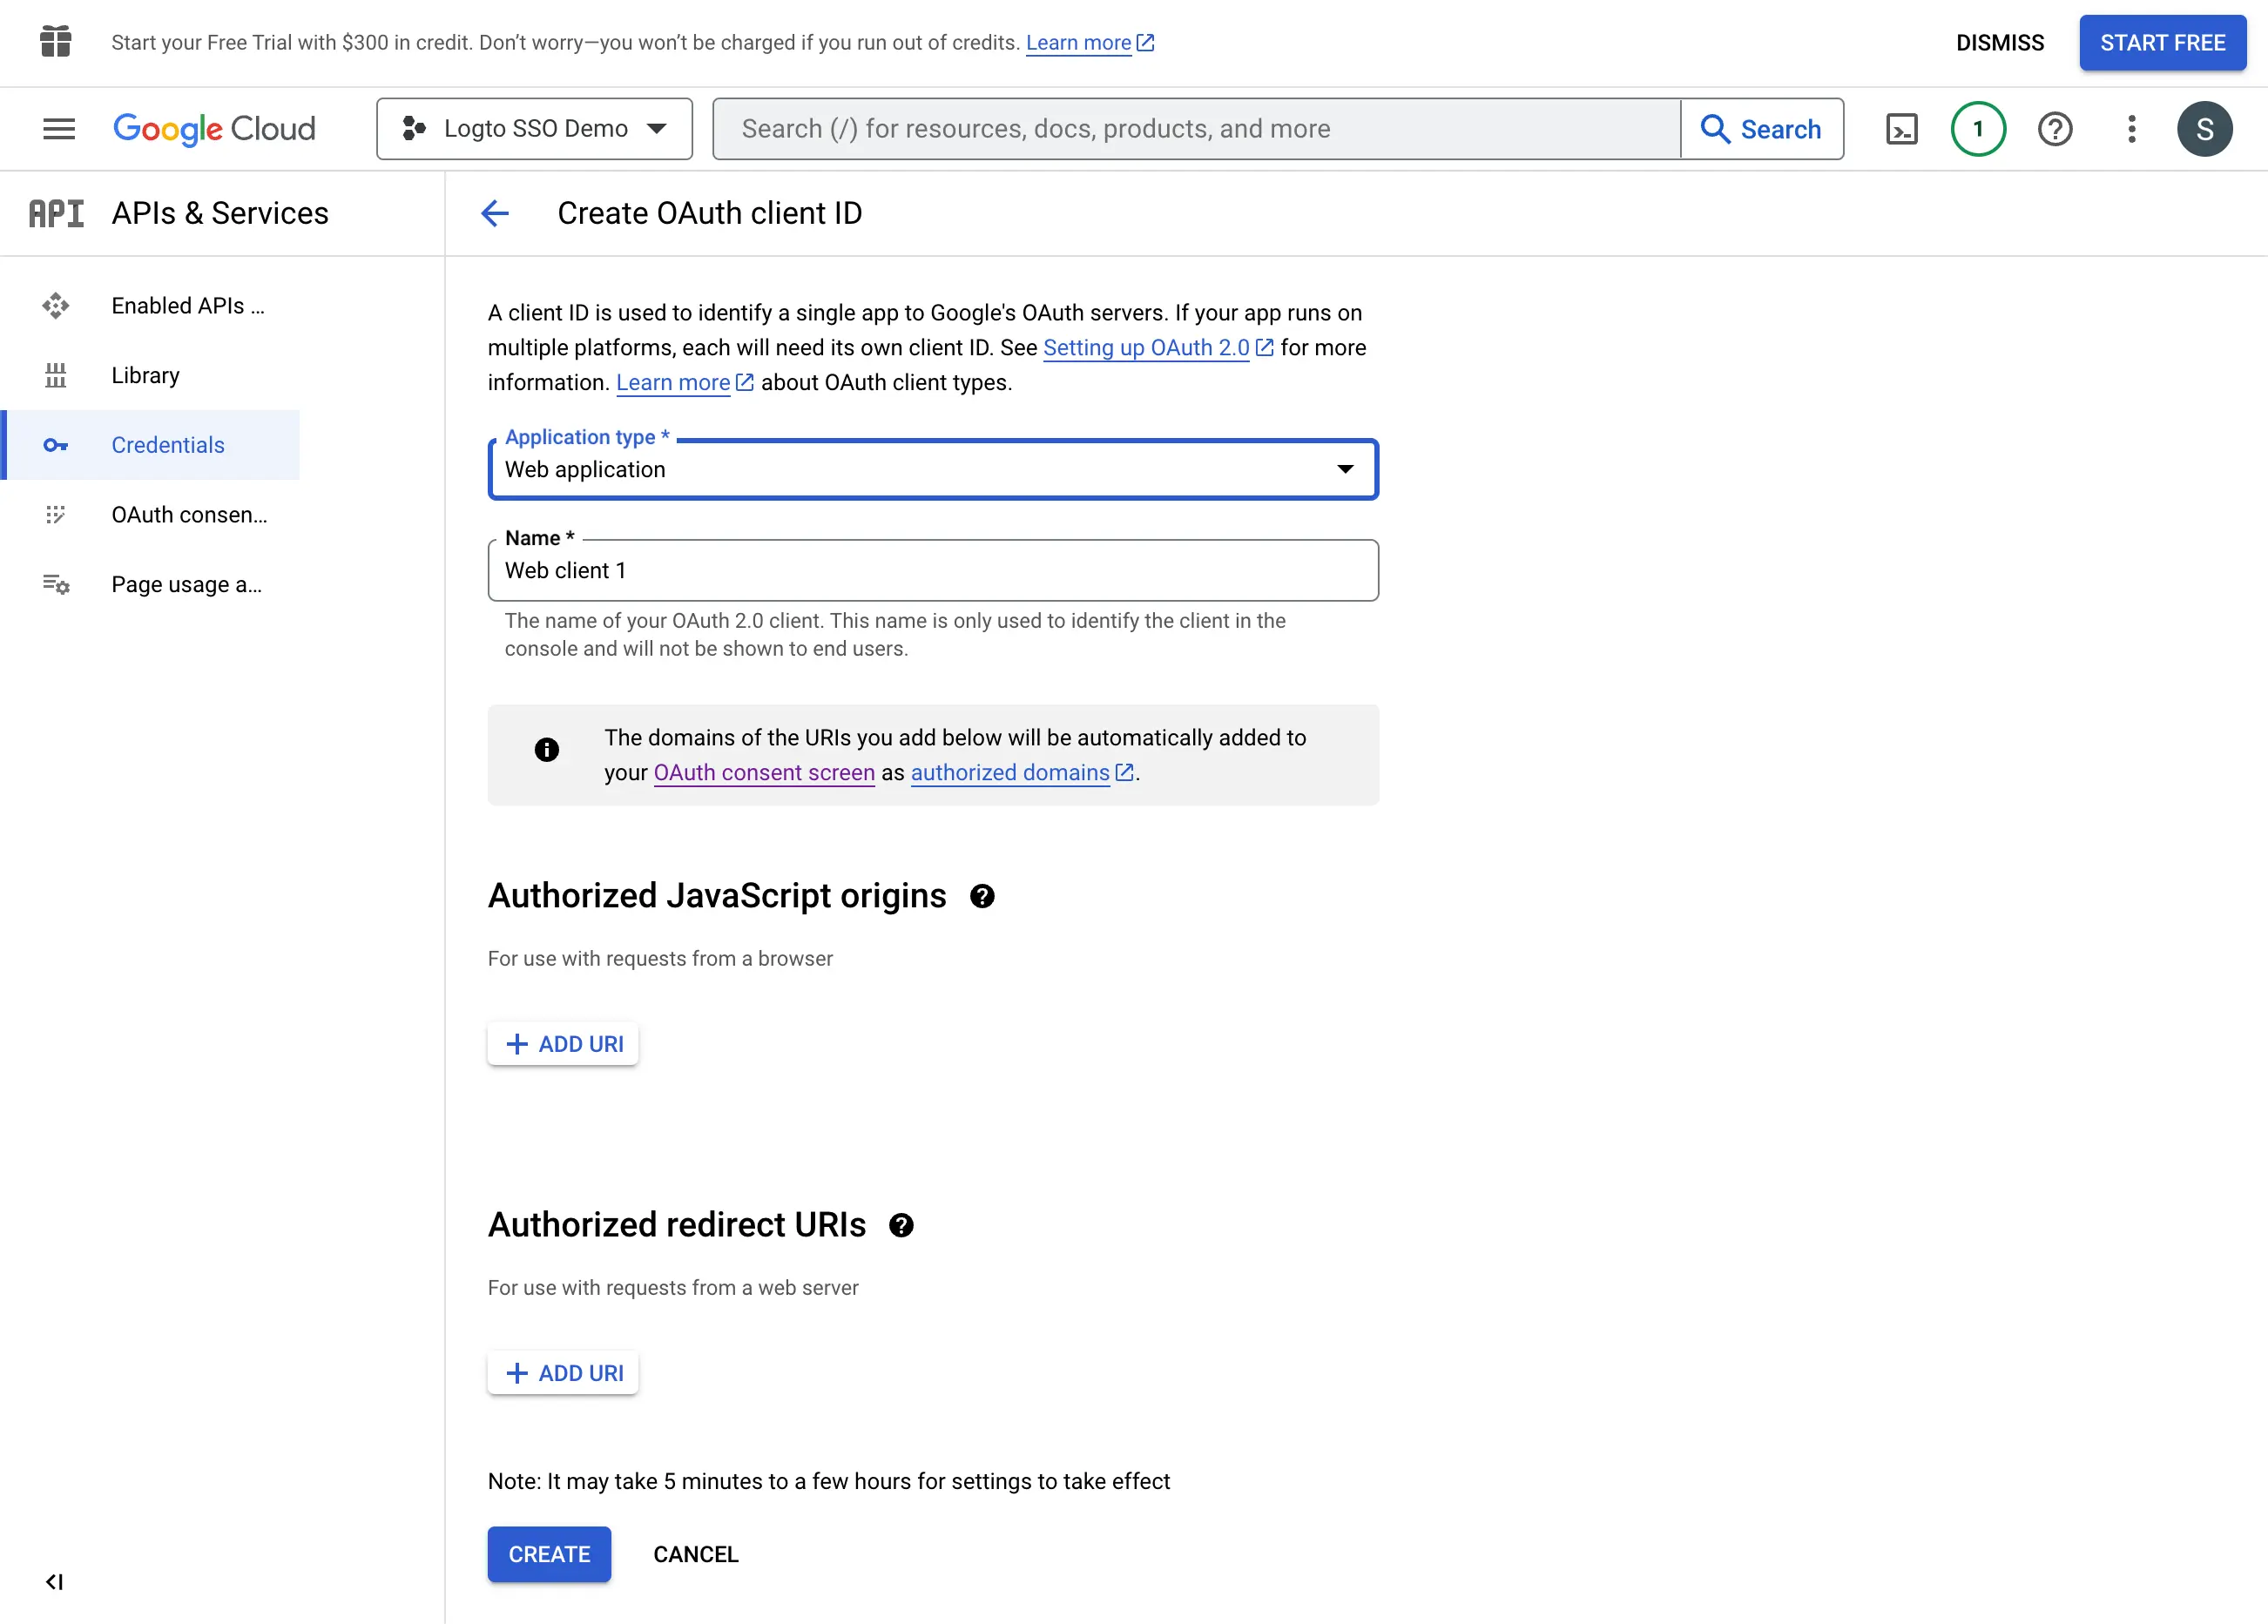
- Select the
Web applicationas the application type. - Fill in the
Nameof your client application,Logto SSO Connectorfor example. This will help you to identify the credentials in the future. - Fill in the
Authorized redirect URIswith the Logto callback URI. This is the URI that Google will redirect the user's browser after successful authentication. After a user successfully authenticates with the IdP, the IdP redirects the user's browser back to this designated URI along with an authorization code. Logto will complete the authentication process based on the authorization code received from this URI. - Fill in the
Authorized JavaScript originswith the Logto callback URI's origin. This ensures only your Logto application can send requests to the Google OAuth server. - Click the
Createbutton to create the OAuth credential.
Step 4: Set up Logto connector with the client credentials
After successfully creating the OAuth credential, you will receive a prompt modal with the client ID and client secret.
Copy the Client ID and Client secret and fill in the corresponding fields on Logto’s SSO connector Connection tab.
Now you have successfully configured a Google Workspace SSO connector on Logto.
Step 5: Additional Scopes (Optional)
Scopes define the permissions your app requests from users and control which data your app can access from their Google Workspace accounts. Requesting Google permissions requires configuration on both sides:
In Google Cloud Console:
- Navigate to APIs & Services > OAuth consent screen > Scopes.
- Click Add or Remove Scopes and select only the scopes your app requires:
- Authentication (Required):
https://www.googleapis.com/auth/userinfo.emailhttps://www.googleapis.com/auth/userinfo.profileopenid
- API access (Optional): Add any additional scopes needed for your app (e.g., Drive, Calendar, YouTube). Browse the Google API Library to find available services. If your app needs access to Google APIs beyond basic permissions, first enable the specific APIs your app will use (e.g., Google Drive API, Gmail API, Calendar API) in the Google API Library.
- Authentication (Required):
- Click Update to confirm the selection.
- Click Save and Continue to apply the changes.
In Logto Google Workspace connector:
- Logto automatically includes
openid,profile, andemailscopes to retrieve basic user identity information. You can leave theScopesfield blank if you only need basic user information - Add additional scopes (separated by spaces) in the
Scopesfield to request more data from Google. Use full scope URLs, for example:https://www.googleapis.com/auth/calendar.readonly
If your app requests these scopes to access the Google API and perform actions, make sure to enable Store tokens for persistent API access in Logto Google connector. See the next section for details.
Step 6: Store tokens to access Google APIs (Optional)
If you want to access Google APIs and perform actions with user authorization, Logto needs to get specific API scopes and store tokens.
- Add the required scopes in your Google Cloud Console OAuth consent screen configuration and Logto Google connector.
- Enable Store tokens for persistent API access in Logto Google connector. Logto will securely store Google access and refresh tokens in the Secret Vault.
- To ensure refresh tokens are returned, configure your Logto Google connector to enable Offline Access.
You do not need to add offline_access in the Logto Scope field — doing so may cause an error. Google uses access_type=offline automatically when offline access is enabled.
Step 7: Set email domains and enable the SSO connector
Provide the email domains of your organization on Logto’s connector SSO experience tab. This will enable the SSO connector as an authentication method for those users.
Users with email addresses in the specified domains will be redirected to use your SSO connector as their only authentication method.
For more information about the Google Workspace SSO connector, please check Google OpenID Connector.